Wednesday 30 November 2022

Time for Snowflakes

It's going to be the 1st of December tomorrow!  I started making my Christmas cards for family and friends back home and as always I like to enclose a new snowflake but sadly this year, I've not had time to work on a new pattern.  So I had a look in my drawer and found all the sample snowflakes I'd made and then found the variations I'd worked on for my 2019 snowflakes.  The one below was version no. 2 and I decided to re-tat it.


I like to start getting into Christmas from the 1st of December, not before if at all possible - apart from the Christmas pudding which I do make in advance as it tastes better.  So tomorrow I can start decorating the house and play the first carol on the piano!

How about you?  Are you into Christmas already?

Best wishes,
Frivole

Monday 31 October 2022

More Giant Tatting

Hello Everyone!  

Sorry I have become a bit of an infrequent poster of late!  There seems to be so many things to keep up with that I don't get around to posting on my blog as often as I used to, or as often as I'd like.

I'm working on large tatting again at the moment, worked with 3mm cotton cord.

I love autumn and its gorgeous colours so here is a bit of large tatting amongst the autumn leaves.

It's the 31st today so Happy Halloween to those who celebrate it!

Best wishes,
Frivole

Wednesday 7 September 2022

Rugged Tatting

My son picked up a stone on the Jurassic coast and wanted to make a necklace out of it.  He wasn't happy with the cord he first used and then his sister gave him some waxed cotton cord but he thought it was too thin.  So I suggested that I tat the waxed cotton.  I thought a lock chain would make a nicely shaped cord for his necklace. 


We think it looks pretty good!


I hope you all had a nice summer.  I've been travelling quite a bit and not posting very much!  But I hope you've all enjoyed lots of creative projects and some lovely weather.  Can't believe it's September already.

Best wishes,
Frivole

Sunday 15 May 2022

Layered Flower Earrings

This is a pattern I've made so many times!  Sometimes I leave the centre open and sometimes I add a flat back pearl in the middle like in these ones.  I have several pairs myself,  I make them for my shop and I like to give them as gifts.  This time it was a gift for a young lady.


Do you have go-to patterns like this that you like to make often?  Tell me about yours!

Best wishes,
Frivole

Monday 2 May 2022

Beaded Bell Earrings

It's my daughter's birthday in a couple of days and I often make her a new pair of earrings for her birthday... sometimes tatted, sometimes beaded.  This year, it's beaded.  I found this cute design by Sonysree Creations on YouTube and here they are:


Of course once I'd made the first pair, 
I had to try them in other colour ways:


I always enjoy a bit of beading!  These earrings were a quick project and will make nice gifts.

Best wishes,
Frivole

Tuesday 19 April 2022

Medallion Collar Finished! ...And Antique Pattern Library

It's done!  I'm so pleased to have finally made this collar.  I modified the first round of the neckline to avoid having to make all those separate diamond-shaped pieces between medallions (as I had discussed in a previous blogpost) and also because I couldn't make them fit right for me.  I used a SCMR with a smaller ring thrown off it to fill the gap instead and incorporated it into the first round of the neck edge which simplifies things a lot.


Now I need to find a way to wear it!  I'm thinking I'd like to make a shirt or a dress from it so that the collar is not just added on top of something but is part of the garment.  I need to give it some thought.


And as we're on the topic of vintage patterns, I wondered if any of you had seen the Antique Pattern Library website?  They have several vintage tatting publications available online.  I need to explore it more.  Here is the link should anyone be interested: Antique Pattern Library

If anyone would like to make the collar, I have a filmed a series of videos that show how to tat it from start to finish.

Best wishes,
Frivole

Saturday 9 April 2022

More Medallion Collar

After the final round of the bottom edge of the collar, I had to figure out the neck edge and firstly the two pieces added on at the ends of the collar.  I debated whether to find a way to incorporate those two pieces into the subsequent rounds rather than having to do them separately and cut and tie for each but in the end, I kept them, again because I want to respect the original as much as possible.

However, I didn't like the way it felt a bit "unfinished" to me.  So I added an extra ring and an extra chain to fill what looked like a gap on my collar.

Please ignore all the messiness around the neck edge where I've been testing different options but if you look just at the two ends:  on the left is exactly as per the pattern and on the right is my modified version where I've added an extra ring and an extra chain.  I could have maybe added two extra chains... but that's what I went with for now.  Probably if I was making this again I would do the double chain to keep more consistent with the rest of the design where all the chains are doubled on the bottom edge of the collar.  But I suppose I was trying to add the minimum possible!


Just three more rounds and the collar will be done!

Best wishes,
Frivole

Saturday 2 April 2022

Think I found it!

Yes, I think I found the way I'm going to make that final round on the bottom edge of the collar.  I wanted to stay as close as possible to the original so I kept the arrangement of three small rings in the space between the scallops but I joined them differently, especially as I had removed the small ring that would have been there from the previous round.  So we're now making three new small rings to fill the space between the scallops.


As you can see, it's definitely not the same but I hope you'll feel I'm keeping close enough to the spirit of the original.

Part of the problem I was finding, if you look at the photo below, was how to move between those two rings without having a fairly long piece of thread carried on the back.  My guess is that there is a piece of thread carried on the back and I think you can see part of it on the top side of the left little ring (where the left arrow points).  That's the thing when working with just one shuttle, you can't make a chain to take you to the next point if needed, you can only carry the thread so you want to avoid having large spaces to cross (I hope that makes sense what I'm saying).  I'd love to be able to examine the back of the original collar!


Photo of original collar from Priscilla Tatting Book No. 2


You can see on the photo below where I have tried tatting the last round as it is written: the mirrored piece is pushed under and I have put the carried thread on top so you can see where it has to travel from and to.  I couldn't see any other way to make that join between the three rings without having that long carried thread which would be on the back.


By making the three small rings on the same round (as per my modification) you only have to carry the thread a short distance between each picot.  I have to say that I do like the look of the mirrored ring and chains that were used in the original but I tried and tried and just couldn't make that part fit nicely for me.

That third round is now making the collar curve and I think it's going to look great!  


Right!  I now need to figure out how to make the neck edge of the collar. 

More testing!

Best wishes,
Frivole

Wednesday 30 March 2022

Medallion Collar Continued

It's taken me quite a lot of time and testing so far and I'm still not sure I've found a solution I'm completely happy with!  That corner area between the medallions is proving tricky!  The other complication is that you're working with just one shuttle on the last round where you are making all the rings which means you can only move from one place to the next by carrying the thread over (can't make chains).  I'm looking for a solution that looks as close as possible to the original, which looks good of course, and executable with one shuttle only!


I've still decided to go with the first two rounds with a small modification and eventually cut all my testing bits so I could film the next part.  Back to just the medallions:


If you're interested in tackling this collar, you can find the videos in this playlist.

And here's where I'm at now:


A bit more testing for the next round required but hopefully I'll come to a solution soon.

Best wishes,
Frivole

Friday 25 March 2022

In the Meantime... Victorian Trellis Collar Ta-da!

I'm continuing to work on the "Medallion Collar" - shall I call it that? - anyone with a better name for the lovely collar from the previous post?  It's just called "collar" in the book but as there are several collars in the Priscilla Tatting Book No. 2, it would be nice to have names for the different collars so we know which one we're talking about.

Which brings me to the topic of this post, as it is about another collar from the same book.  Well, it's actually not a collar but if you remember a while back I decided to tat the Victorian Trellis Doily as a collar and I've finally finished it!  It's been finished for a while in fact but for some reason I'd never got around to sewing the last ends in and taking a photo.  

But here it is...


I'm not too sure yet with what and how to wear it but here is a photo just to give an idea of what it might look like when worn as a collar.  Are lace collars too old-fashioned?  Is there a modern way to wear them nowadays?  I hope so because I really like everything about this design, the victorian sets, the shape, the combination of elements, the balance of positive and negative spaces, etc.  You could just see it as an elaborate necklace, no?  In fact it's all in the name isn't it, showing what was valued before as jewellery... "neck-lace".


Best wishes,
Frivole

Monday 21 March 2022

Many Problems!

Even before I've completed all the medallions, I decided to start testing the other rows to make sense of the pattern and see how everything fits together.  The piece you're seeing therefore is messy as it's all just testing:  there's knots and loose threads and different elements that I've tried out so it looks disorganised at the moment.  But once I've figured out what I'm doing, I will cut it all out and start again.

Yes, there are many problems with this pattern!  As can often be the case with vintage patterns, I just cannot make things fit as per the way the pattern is written.  If I try to follow just as is indicated, elements end up all crammed in in places but mostly, the collar just won't curve as it should.  If I make the neck edge as written, the curve is practically non existent, you'd end up with an edging rather than a collar.

I don't really know what's so different as I feel that my medallions look pretty much like the ones in the photo in the book... so why can't I get everything else to fit around them?


I'm determined to make this work though, even if it will mean adjusting the pattern so that I end up with the right shape and with all elements fitting well with each other.

The finished collar will therefore not be exactly like the one in the book - I feel the changes will be mostly around the neckline - but it will still look close to the original.

Examining it again, I think that my medallions are perhaps tighter/smaller than the ones in the book which would affect all the elements around... but still I don't see that it should cause that many problems.

I'll keep at it!

Best wishes,
Frivole

Friday 11 March 2022

Minimal Progress

A while ago I showed you the start of a collar (more info on it in this blogpost).  I was making it in size 20 thread but the book calls for size 10 and I eventually decided to start again with the right size thread after all.  I don't often choose to work with the thicker thread as I find the movements don't flow quite as well for me as with finer thread.

As you can see I'd not got very far anyway so it wasn't too much of a heartbreak to start again and you can see how considerably larger the motifs are in size 10 compared to the size 20 ones.


I'm excited about this collar and continue to be frustrated that I can still only do a bit of tatting at a time (tendonitis how I dislike thee!) but like the tortoise, I'll get there eventually.  

I'm wondering about making some YouTube videos about this collar since I'll be working on it for a while, what do you think?

I'm adding the photo of the collar again so you can see what I'm working towards if you'd not seen it before.  It's from Priscilla Tatting No. 2 Book which can be found online here.


Best wishes,
Frivole

Tuesday 1 March 2022

Little Cross

I have made this little cross by Elizabeth Zipay a few times already.  I needed a small gift for a family member and decided the cross would make a nice bookmark.  I purchased the pattern many years ago but somehow couldn't find it in my files so had to purchase it again - I didn't mind though as it's a small amount and I'm always happy to support other tatters.

I use to really enjoy Elizabeth's blog and her beautiful tatting.  Sadly she is busy with other things and not active on her blog or in her shop anymore (though her shop is still open wit a few patterns for sale).


I do like this cross pattern very much.  It's tatted in one pass.  The construction of the longer bottom part with rings made from one side means it doesn't look completely symmetrical but that's ok and I still like the overall look of it.

Best wishes,
Frivole

Sunday 13 February 2022

La Feuille Frivole

I keep having problems with people not being able to download my patterns over at Google Docs.  I have set permission to "everyone with the link can view" but I still regularly get people telling me they are not able to access some of my patterns and I don't know why.

So I'm trying something new.  I'll see if I can embed the patterns right here into my blogposts and use new links to re-direct people here if that works better.

If you click on the little arrow in the right-hand corner of the image,(it says "pop out" if you hover over it)
this should take you to the page from where you can download it.

I'm trying it with my very first pattern which is this little leaf called "La Feuille Frivole".

If a few people would be kind enough to tell me if they can see the pattern and are able to download it for printing, I'd be grateful.

Many thanks!

Best wishes,
Frivole

Saturday 22 January 2022

Start of 2022

It's already the 22nd of January!  Oh, 22nd of 2022... that's a lot of 2s!  It's about time I write something new since my previous blogpost was my Christmas one.

Tatting and other similar activities are still on the back-burner.  I do a little bit here and there but no larger projects that I can tackle at the moment.

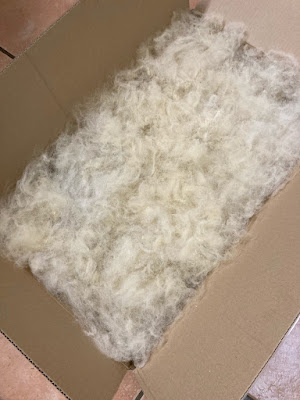
Instead a holiday project was to have a go at felting wool.  You know I have those fleeces that I'm spinning and knitting... well, my son had seen a video of someone felting wool using cardboard so we decided to give it a try.

You first have to pull all the wool fibres apart into tiny wisps so that it's all very fine and airy.  Place it all in a cardboard box and make sure the thickness is even everywhere.  Ours was about 4 inches thick initially.


Then you turn the box over and you have a nice "square" of thick wool fibres.
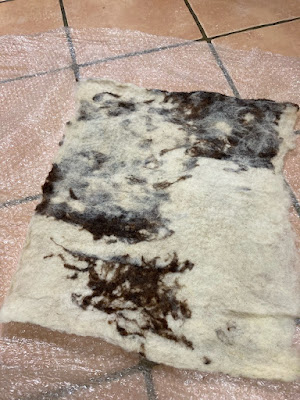
The person in the video we'd seen rolled his fibres in cardboard but we used bubble wrap instead.
So you wet the fibres and then roll them up in the bubble wrap.
And then you have to keep rolling and rolling and then unwrapping and turning
your wool piece and keep rolling until the fibres start blending together.
As you can see we used brown and white wool.

It's not quite finished
but we're getting there!


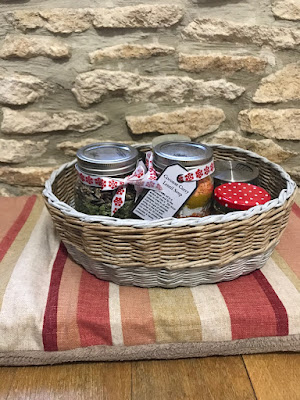
Otherwise I've been making more newspaper baskets.  I used purple cabbage water to dye the paper for this one.  It gives it a subtle lilac colour.  I dye the rolls first, let dry, then varnish them with diluted varnish  and let dry again before I used the rolls for making the basket.


I've now run out of my dyed rolls so I need to make more!
I finished the rim (will have to show another photo in next blogpost)
but I still have to make the handle.

I made another smaller one that I gave to my daughter:


And there's another blue one of which I just realised I don't have a good photo
(so for next blogpost).


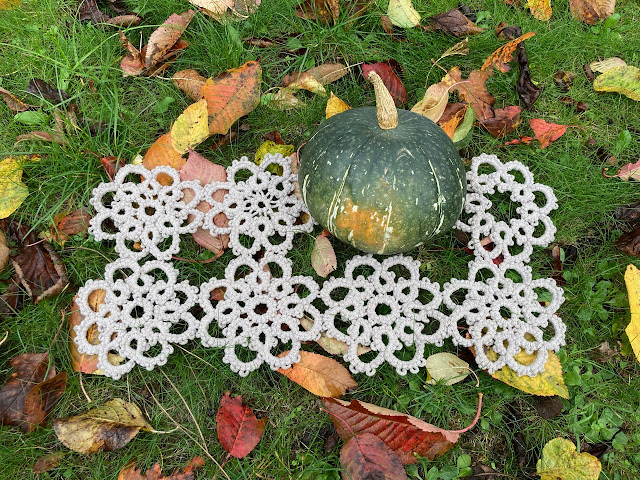
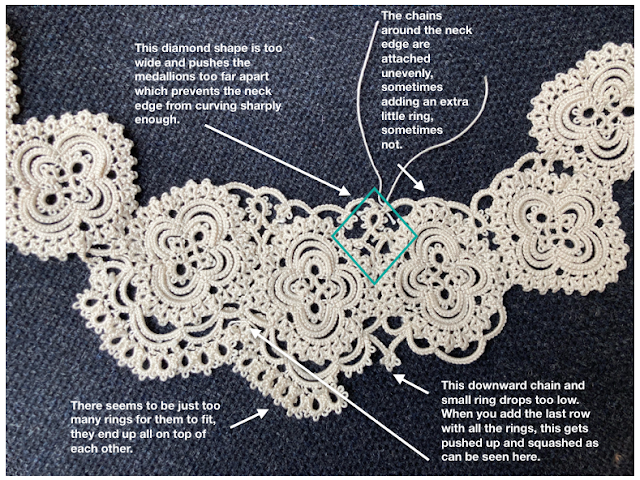
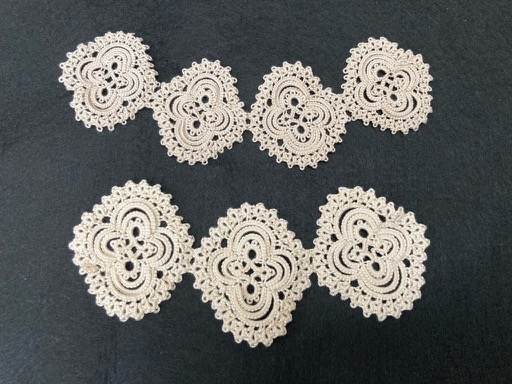
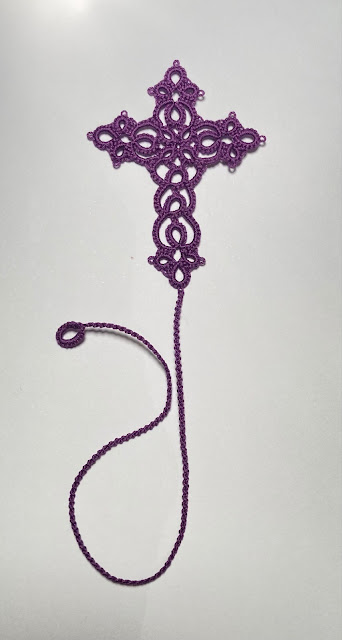
And to finish, a very little bit of tatting.  I really want to keep working on this collar but I just can't tat much at all so it will be a while before I can make much progress on it.  *Sigh*


I hope all is well with you all and that your new year is off to a good start.  I'd love to hear what projects you are currently working on after the holidays.

Best wishes,
Frivole